Manage Entities of Interest
The Entities of interest panel shows all the entities related to an investigation signals. Cytomic Orion automatically adds the entities it extracts from an incident signals to the list.
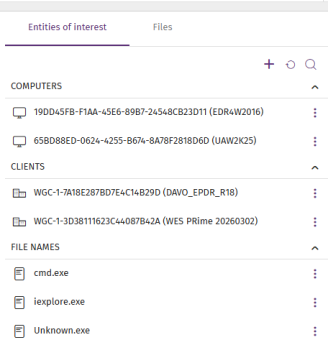
From the Entities of interest list, you can:
Manage Entities of Interest
-
To refresh the list, click
.
-
Click the name of a section in the panel to show or hide the entities it contains.
-
To manually add an entity of interest:
-
Click the
icon. Select Add entity of interest. The Add entity of interest dialog box opens.
-
Click the Type drop-down menu. A list opens and shows the available types of entities of interest. See Types of Entities.
-
In the Entity text box, type the necessary information for the entity. To add a Computer entity, see Add Computer Entities.
-
Click Add. If the information is valid, the console adds the entry to the list of entities with the
 icon. This icon indicates that the entity was added manually.
-
-
To search the list:
-
Click the
icon. A text box appears.
-
In the text box, type the name of the entity. The list automatically shows the entries that partially match the text you typed.
-
-
To copy the name of an entity to the clipboard:
-
Click the
icon for the entity you want to copy. A context menu opens.
-
Select Copy to clipboard. The entity information is copied to your operating system clipboard.
-
-
To delete an entity of interest, see Delete Entities of Interest
-
To run an investigation or remediation tool on an entity, see Run Investigation or Remediation Tools.
Delete Entities of Interest
You can delete only entities of interest that you added manually and are not related to a signal or an incident included in the investigation):
Each investigation must have at least one client assigned. When you remove the last client from an investigation, the investigation is completely deleted.
To delete entities of Interest:
-
Click the
-
Select Delete from the list of entities of interest. A confirmation dialog box opens.
-
Click Delete. The entity of interest is removed from the list.
Add Computer Entities
To add a Computer entity with the drop-down menu:
-
Click the Entity text box. A list opens and shows the client’s computers that are visible to your user account. See Client Visibility Settings.
-
From the list, select a computer.
To add a Computer entity from the Select computer list:
-
Click the
-
To filter the list by client:
-
Click the Client text box. A list opens and shows the clients that are visible to your user account.
-
Select a client. The list updates and shows the computers that belong to the client you selected.
-
-
To filter the list, in the Search computer text box, type a computer name. The list updates and shows the computers that partially match the text you typed.
-
To configure the list view, see List Configuration Tools.
-
Select the check box for the computer you want to add.
-
Click Select. The dialog box closes, and the computer MUID is added to the Entity text box.
Types of Entities
-
Computer
 : The computer MUID. Computers without a valid license ( active or in grace period) appear in red.
 -
Client
 : The name and identifier of the client to which the investigated computer belongs. If the account you use to access the web console does not have sufficient permissions, only the identifier is shown.
 -
User
: The user account that ran the program that caused the signal. -
File hash
 : The file digital fingerprint.
 -
IP address
 : The computer IP address.
 -
Port
 : The port on which the process that generated the signal on the computer ran.
 -
Domain
 : The domain for a communication made to or from the computer.
 -
URL
 : A web address accessed from the computer.
 -
File path
: The location of a file in the computer file system. -
File name
: The name of a file on the computer.
Run Investigation or Remediation Tools
You can use investigation or remediation tools on Computer entities:
-
If it is collapsed, click the header of the Computers section to show the entities it contains.
-
Click the
-
Select an investigation or remediation tool:
-
Investigate computer
 : Review the events logged in the investigation console. For more information, see Analyses Using the Investigation Console.
 -
Automated investigation
 : Use a notebook to analyze the signals detected on the computer. For more information, see Investigations with Notebooks.
 -
Assisted investigation
: Open a wizard to start an assisted investigation. For more information, see Assisted Investigations. -
Isolate computer
 : Block all communications to and from the computer. For more information, see Isolate Computers.
 -
Stop isolating computer
 : Restores all communications on the computer. For more information, see Isolate Computers.
 -
Remote access to computer
 : Remotely run commands on the computer. For more information, see Remote Command Line.
 -
Restart computer
 : Remotely restart the computer. For more information, see Restart Computer.
 -
Computer details
 : Review information about the computer. For more information, see Computer Details
-