Assign Signals to Investigations
To manually assign signals to investigations, the user account you use to access Cytomic Orion must have the Manage signals in incidents permission assigned to its role. For more information about roles and permissions, see Understanding Permissions.
You can assign signals to investigations manually or by using automatic assignment rules. To create an automatic assignment rule, see Automatically Assign Signals to Investigations.
You cannot assign the same signal to more than one investigation.
To manually assign signals to an investigation:
-
From the top menu, select Signals. The Signals list opens.
-
To modify the list view and quickly find signals of your interest, see List Configuration Tools.
-
To show signals that are not assigned to an investigation, at the top of the page, click Unassigned to Investigation. The list updates automatically.
-
Select the check boxes for the signals you want to assign. A toolbar appears under the top menu.
-
Select an action:
-
Add to new investigation: Creates a new investigation and assigns the signal to it. See @falta topic@.
-
Move to existing investigation: Unassigns the signal from the investigation it belongs to and assigns it to the investigation you select. The Select an investigation dialog box opens. See Assign Signals to an Existing Investigation.
-
Add to existing investigation: Assigns a previously unassigned signal to an existing investigation. The Select an investigation dialog box opens. See Assign Signals to an Existing Investigation.
-
Move to new investigation: Unassigns the signal from the investigation it belongs to and assigns it to a new investigation. See @falta topic@.
-
Assign Signals to an Existing Investigation
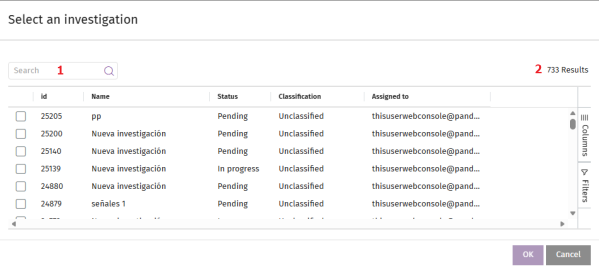
Select the target investigation:
-
To filter the list of investigations, see Search Tools.
-
To modify the list view and quickly find investigations of your interest, see List Configuration Tools.
-
For more information about the fields in the list, see Fields in the Select an Investigation List.
-
Select the check box for the investigation you want to assign the signal to.
-
Click OK. The signal is assigned to the selected investigation, and the dialog box closes.
Fields in the Select an Investigation List
| Field | Description |
|---|---|
|
Assigned to |
The user account assigned to the investigation. |
|
Classification |
The investigation classification based on the category of the malicious activity detected. |
|
Clients |
A comma-separated list of the clients associated with the investigation. |
|
Created by |
The user account that created the investigation. |
|
Description |
The investigation description. |
|
Status |
The current phase of the investigation. See Fields in the Investigations List. |
|
Creation date |
The date when the investigation was created. |
|
Incidents |
The total number of incidents in the investigation. |
|
Name |
The investigation name. |
|
Priority |
The priority level of the investigation. |
|
Risk |
The severity of the threat impact. |
|
Signals |
The number of signals included in the investigation. |
| Fields in the Investigations list | |