Automatically Assign Signals to Investigations
Create assignment rules to add signals that meet the criteria you choose to an investigation.
Assignment rules are sets of criteria that identify the signals assigned to investigations. Use an existing signal to set a base configuration of criteria.
Automatic assignment rules do not affect already generated signals.
To create, edit, or delete automatic assignment rules, the user account you use to access Cytomic Orion must have the Manage automatic signal assignment rules permission assigned to its role.
To access the list of automatic assignment rules, the user account you use to access Cytomic Orion must have the View automatic signal assignment rules permission assigned to its role.
For more information about roles and permissions, see Understanding Permissions.
This topic includes:
Create Automatic Assignment Rules
To create an automatic assignment rule from a signal:
-
From the top menu, select Signals. The Signals list opens.
-
To modify the list view and quickly find signals of your interest, see List Configuration Tools.
-
Select the check box for the signal you wan to use as the base for the assignment rule. Make sure you select only one signal. A toolbar appears under the top menu.
-
In the toolbar, click Add automatic assignment rule
 . The Add automatic assignment rule dialog box opens and shows a series of preset criteria based on the selected signal.
 -
To assign an investigation to the rule, see Select an Investigation.
-
In the Name text box, type a new name for the rule.
-
In the Description text box, type a description of the rule (optional).
-
To set the assignment criteria, see Configure Criteria for Signal Assignment Rules.
-
Click OK. The assignment rule is created and begins assigning the new signals that meet the criteria defined in the rule to the selected investigation.
Select an Investigation
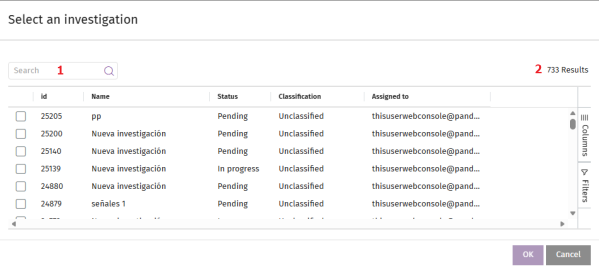
Select the target investigation:
-
To filter the list of investigations, see Search Tools.
-
To modify the list view and quickly find investigations of your interest, see List Configuration Tools.
-
For more information about the fields in the list, see Fields in the Select an Investigation List.
-
Select the check box for the investigation you want to assign the signal to.
-
Click OK. The signal is assigned to the selected investigation, and the dialog box closes.
Fields in the Select an Investigation List
| Field | Description |
|---|---|
|
Assigned to |
The user account assigned to the investigation. |
|
Classification |
The investigation classification based on the category of the malicious activity detected. |
|
Clients |
A comma-separated list of the clients associated with the investigation. |
|
Created by |
The user account that created the investigation. |
|
Description |
The investigation description. |
|
Status |
The current phase of the investigation. See Fields in the Investigations List. |
|
Creation date |
The date when the investigation was created. |
|
Incidents |
The total number of incidents in the investigation. |
|
Name |
The investigation name. |
|
Priority |
The priority level of the investigation. |
|
Risk |
The severity of the threat impact. |
|
Signals |
The number of signals included in the investigation. |
| Fields in the Investigations list | |
View Automatic Assignment Rules
-
From the top menu, select Settings. From the side menu, select Assignment rules for signals. A list opens that shows all created rules.
-
To modify the list view and quickly find signals of your interest, see List Configuration Tools.
-
To filter the list, see Search Tools.
-
For more information about the columns in the list, see Fields in the Select an Investigation List.
Meaning of List Fields
| Field | Description |
|---|---|
|
Description |
Description assigned by the analyst. |
|
Creation date |
Date when the rule was created. |
|
Modification date |
Date when the rule was last modified. |
|
Last assignment date |
Date and time when the rule last activated. Use this field to determine how often the rule activates. |
|
Hunting rule |
Name of the hunting rule that generates the signals. |
|
Client ID |
Identifier of the client where the signal was logged. |
|
Signals assigned in the last 30 days |
Number of signals the rule assigned to an investigation in the last 30 days. Use this field to determine how often the rule activates. |
|
MUID |
Identifier of the computer where the signal was logged. |
|
Name |
Rule name. |
Edit Automatic Assignment Rules
-
From the top menu, select Settings.
-
From the left side menu, select Assignment rules for signals. A list opens that shows all created rules.
-
Select the rule you want to edit. The Edit automatic assignment rule page opens. See Create Automatic Assignment Rules.
Delete Automatic Assignment Rules
-
From the top menu, select Settings.
-
From the left side menu, select Assignment rules for signals. A list opens that shows all created rules.
-
Select the check boxes for the signals you want to delete.
-
In the action bar, click Delete
. A confirmation dialog box opens.
-
Click Yes. The assignment rule is deleted.
Export the List of Assignment Rules
-
From the top menu, select Settings.
-
From the left side menu, select Assignment rules for signals. A list opens that shows all created rules.
-
Click the
icon to export the list to a CSV file. The CSV file downloads to your computer.